Siding, Flashing and Rot Repair
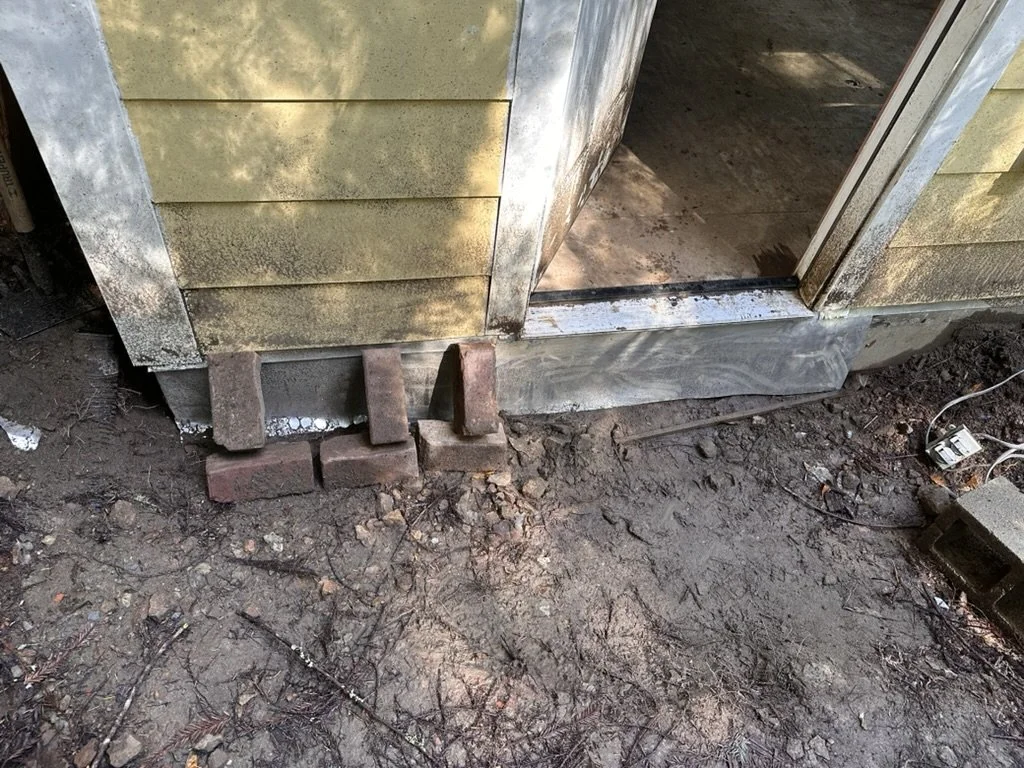
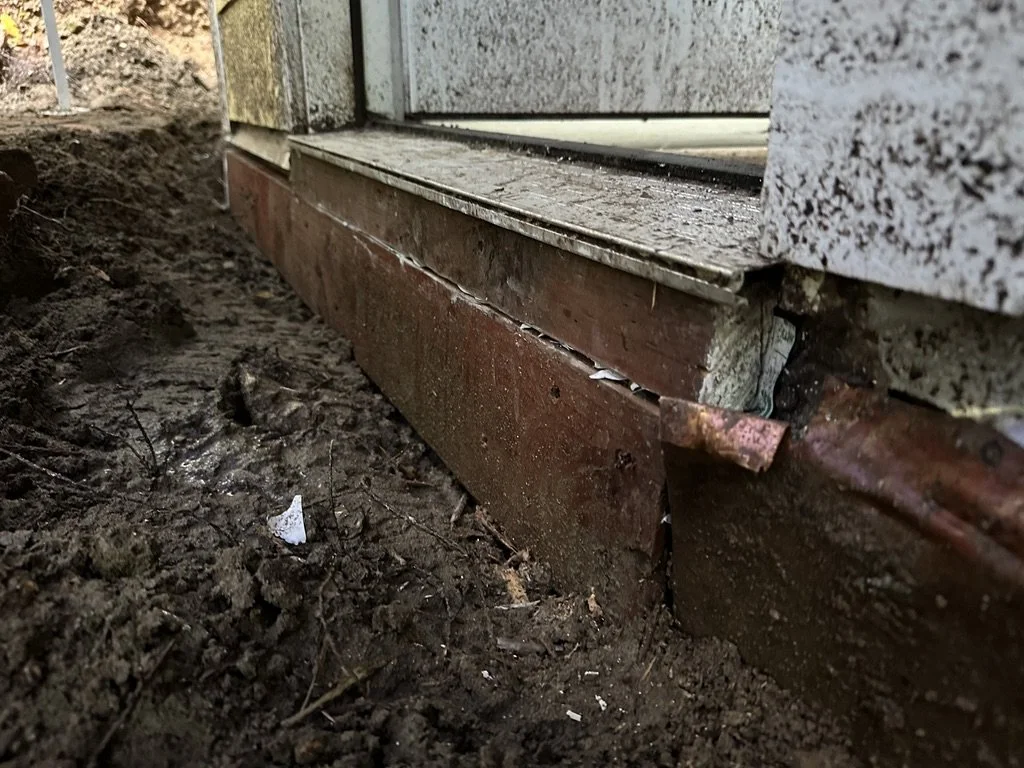
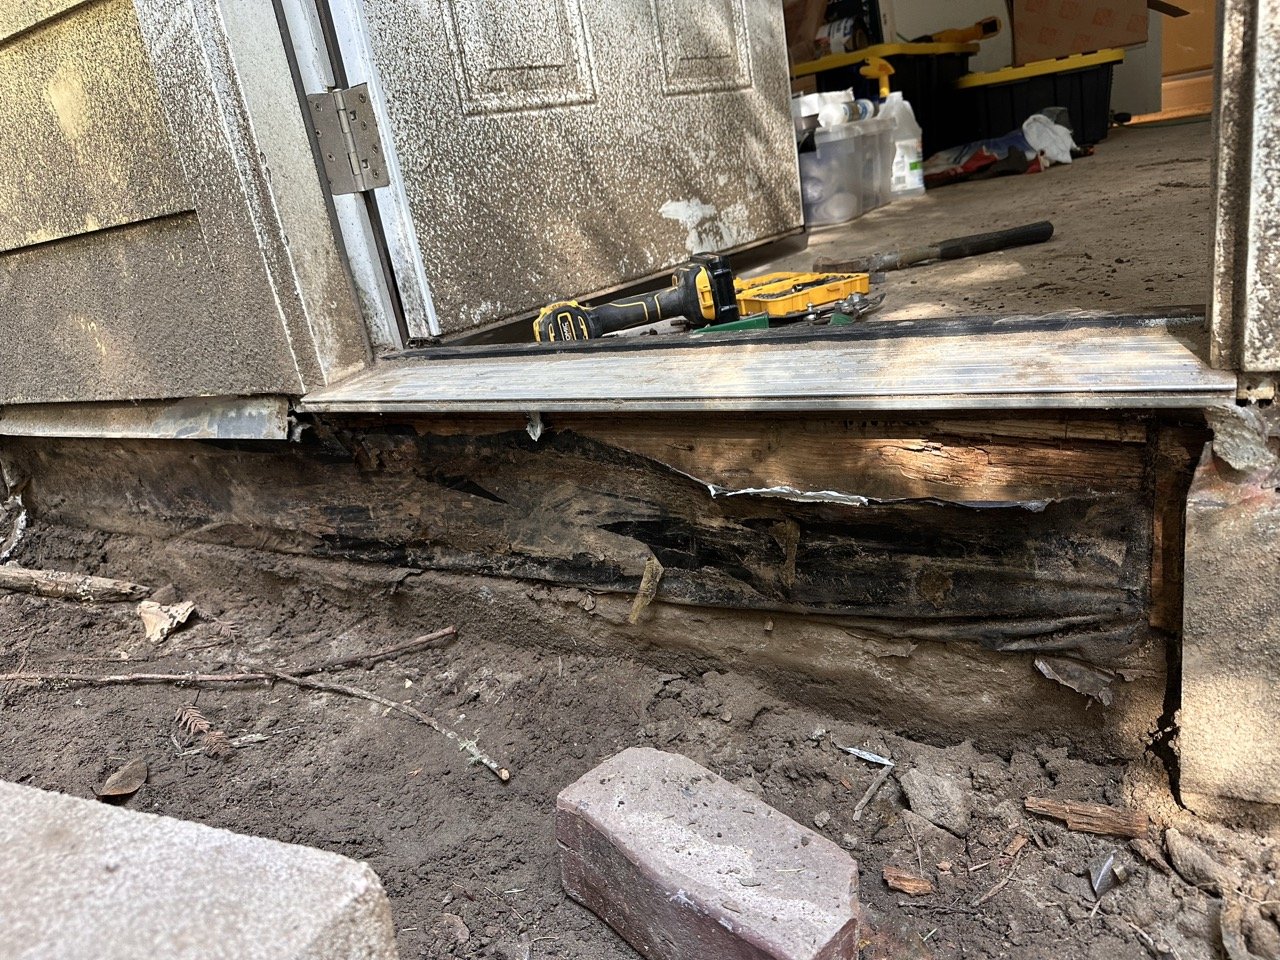
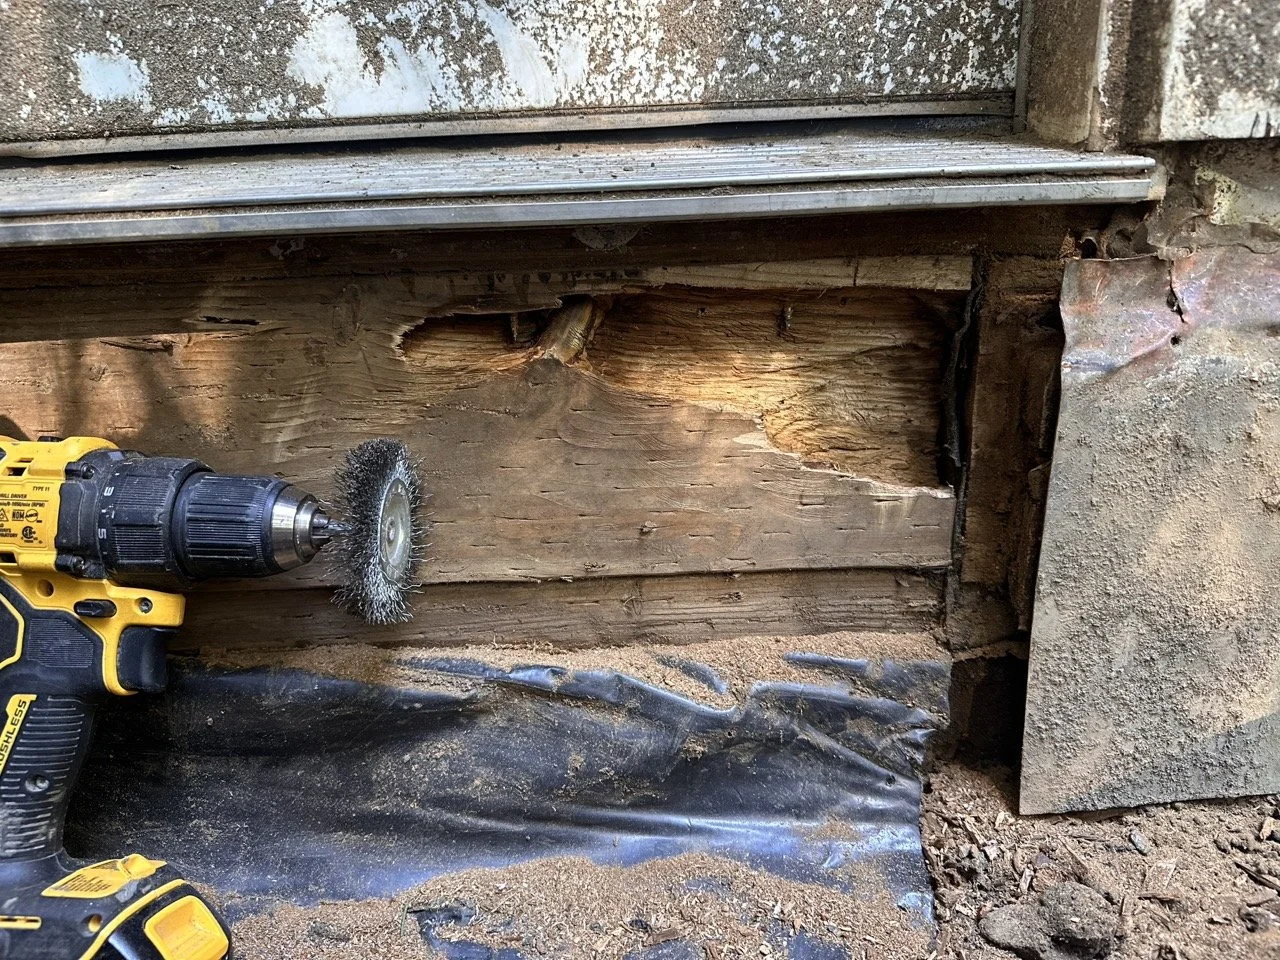
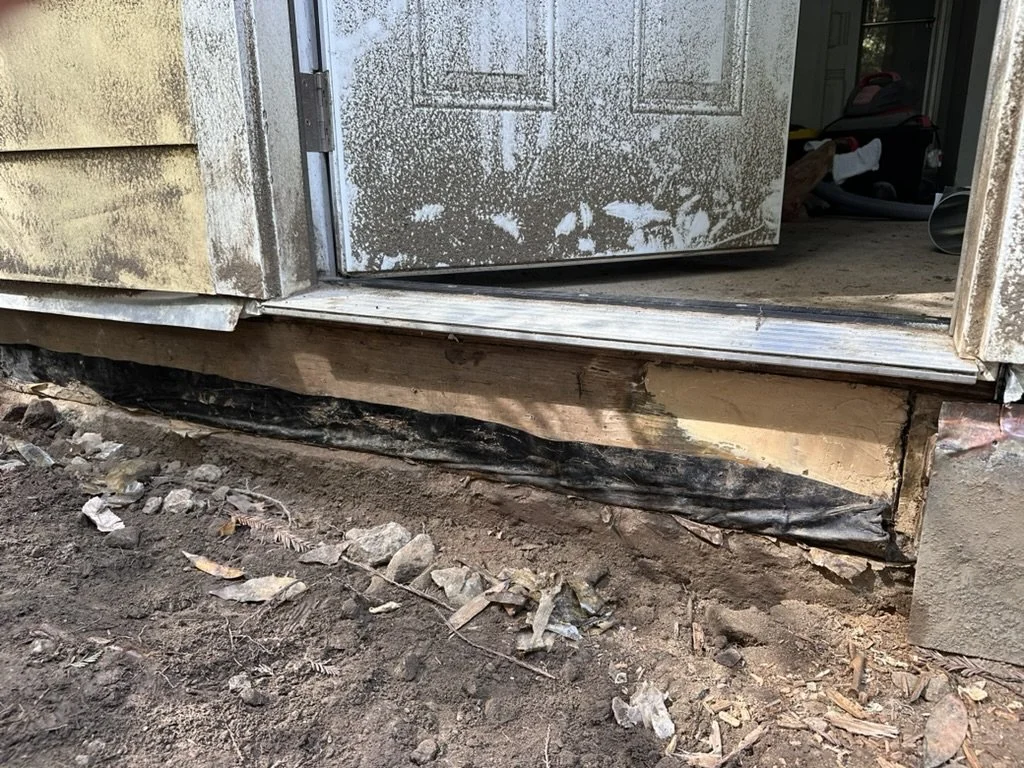
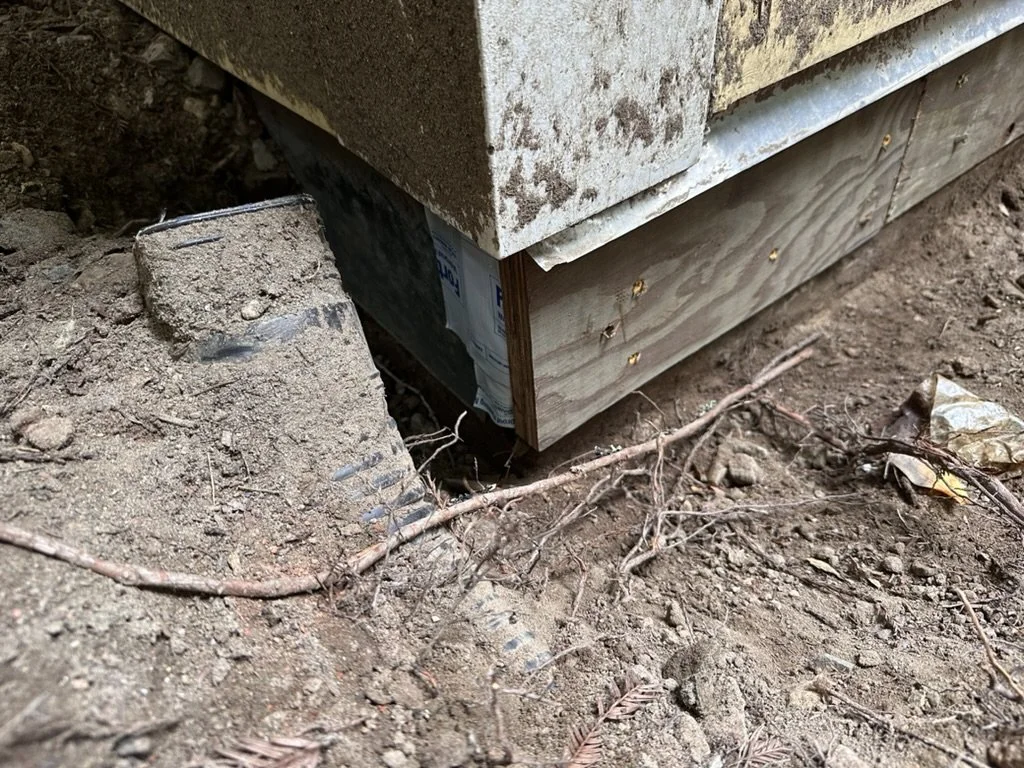
A temporary flashing and siding repair job was put in place to get this area through the winter storms. I then came in to fix it correctly. I removed the temporary flashing to reveal two sandwiched PT wood.

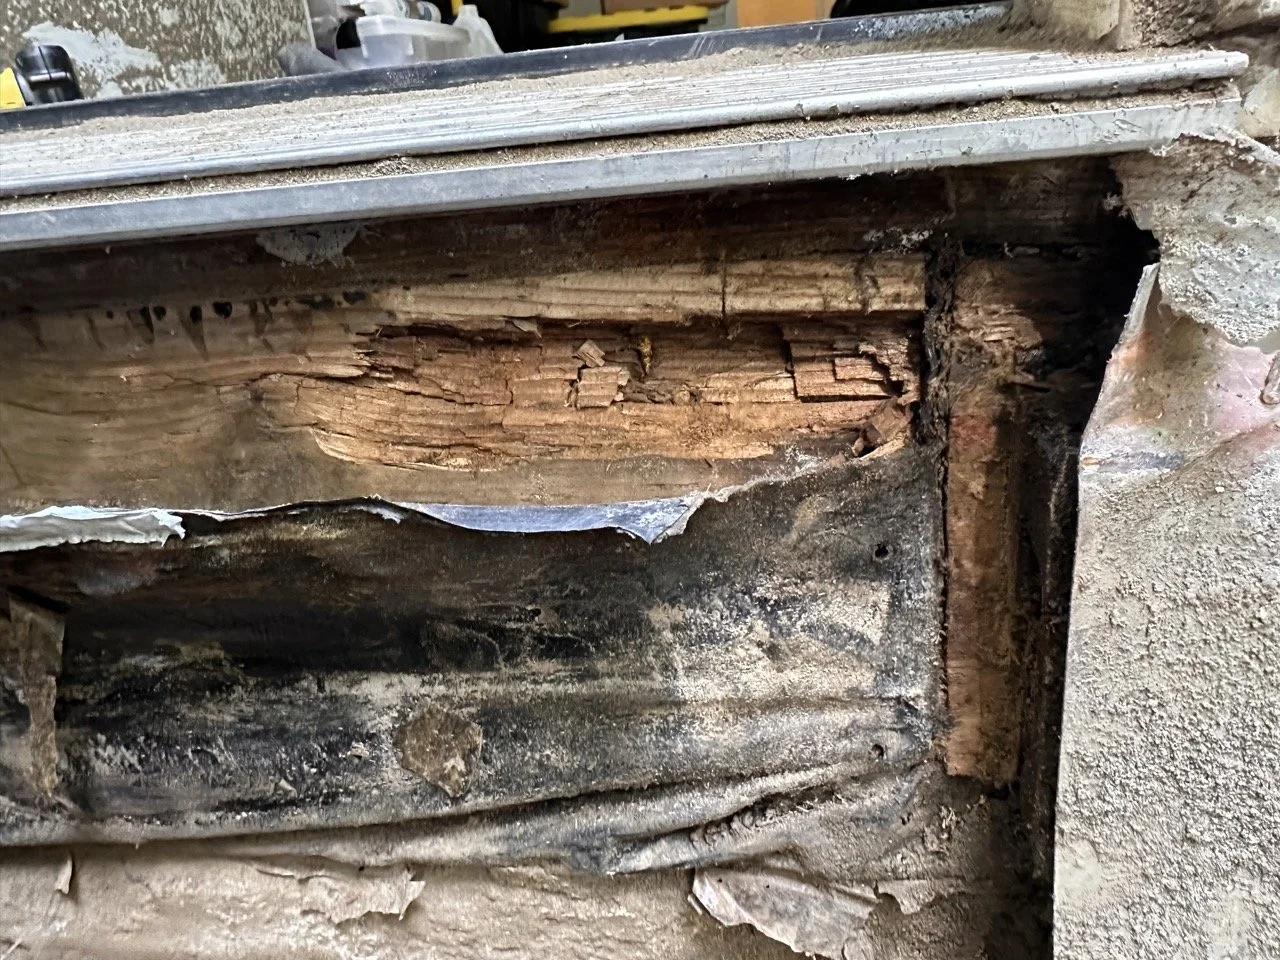
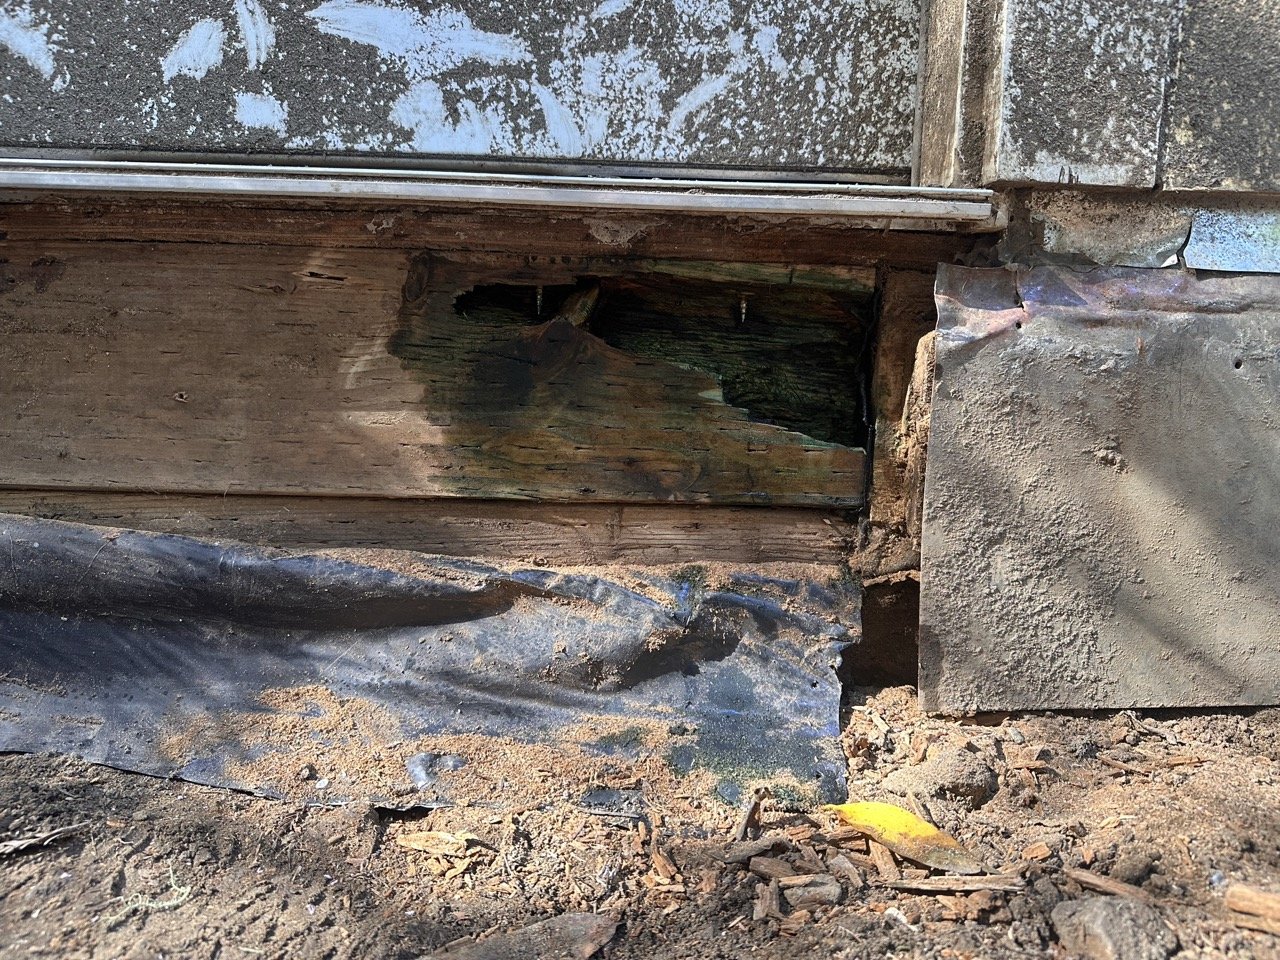
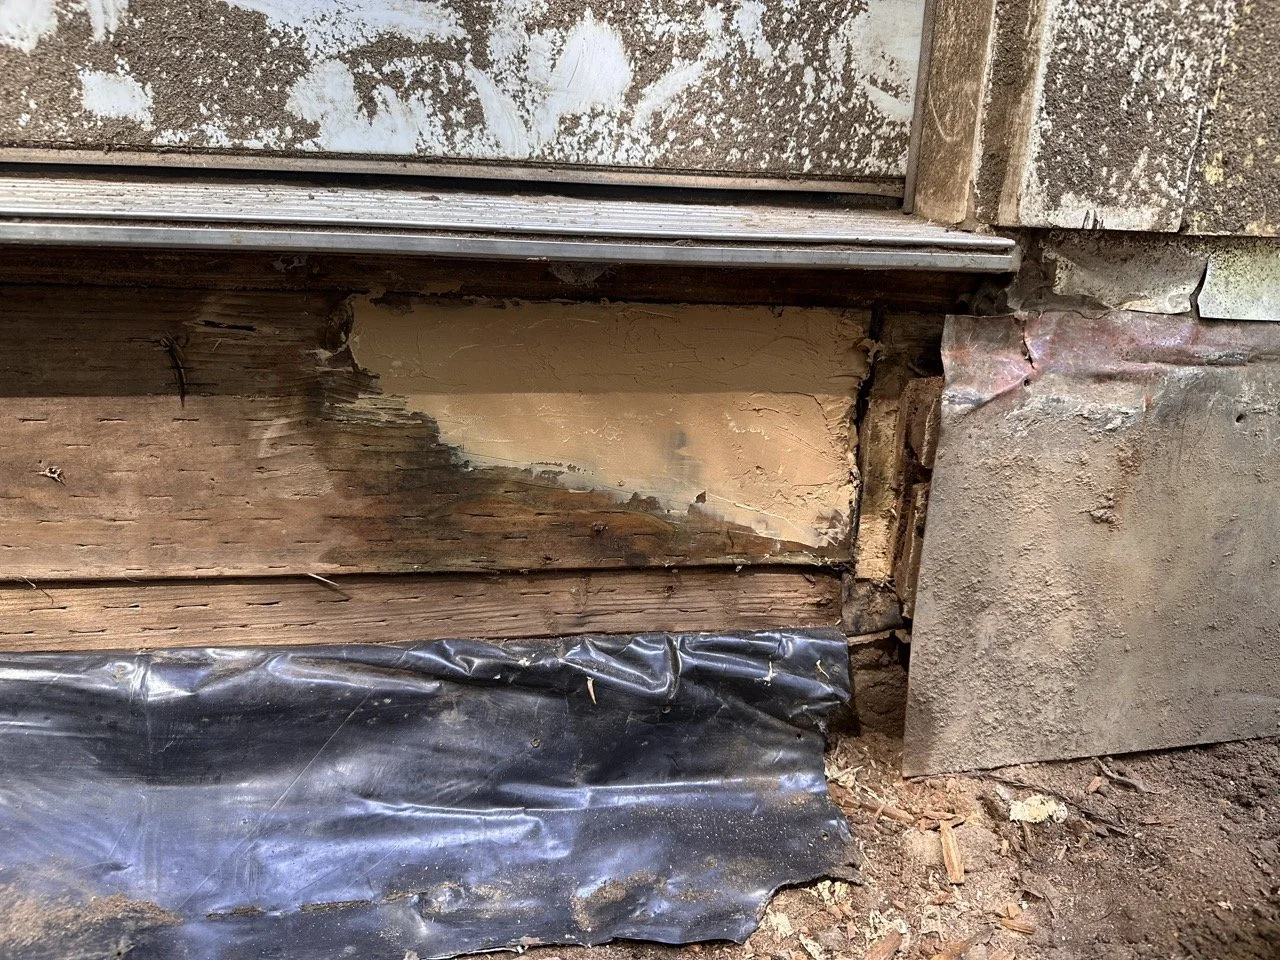
I removed the PT wood which revealed some old moisture barrier, the bottom plate and the exterior rim joist. I identified a small section of rot on the rim joist so I cleared out the rot with a wire brush, treated the wood with Copper Green, and filled the gap with bondo. I decided to fill instead of fully replace the joist because it is just a very small section of one of two stacked exterior rim joists.
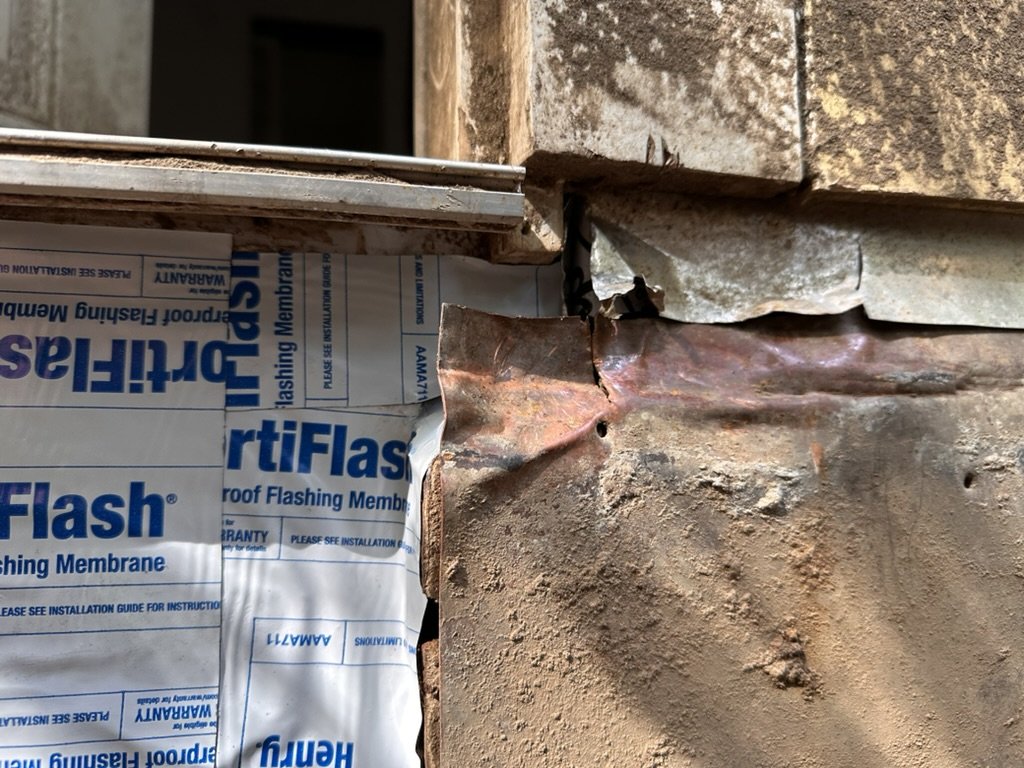
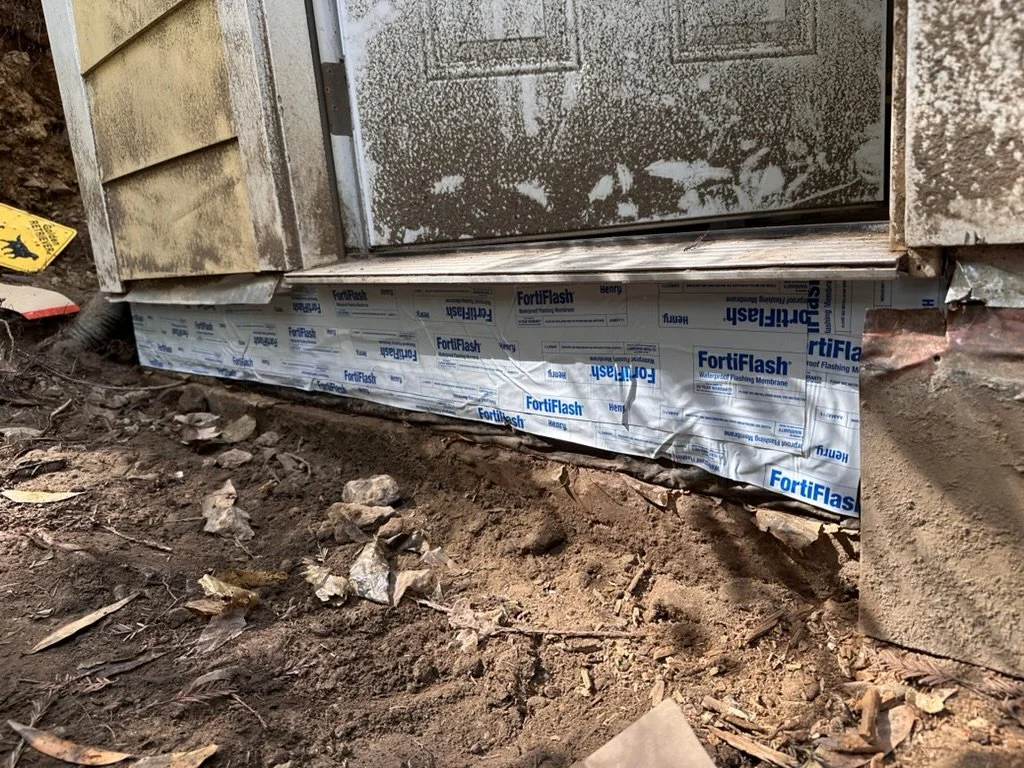
I then reattached the preexisting moisture barrier with some silicone caulking (mostly to just keep it in place while I work) and added two overlapping layers of fortiflash. I made sure it overlapped as far as I could to the right where the barrier ends and as far into the little nooks created by the door frame and siding.
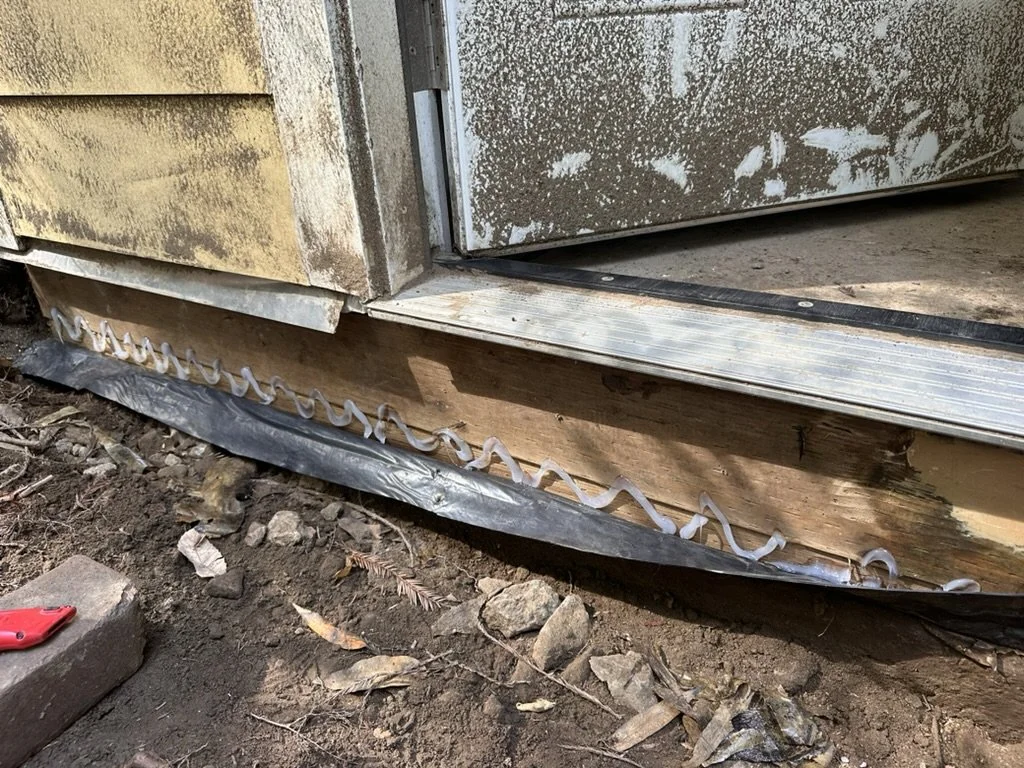
I then cut two pieces of siding using PT plywood. I decided to use PT plywood because it will be water resistant and hidden by flashing, so it doesn’t need to look nice. I was able to cut pieces to fit perfectly under the sill plate as well as into the nook to the right of the door.

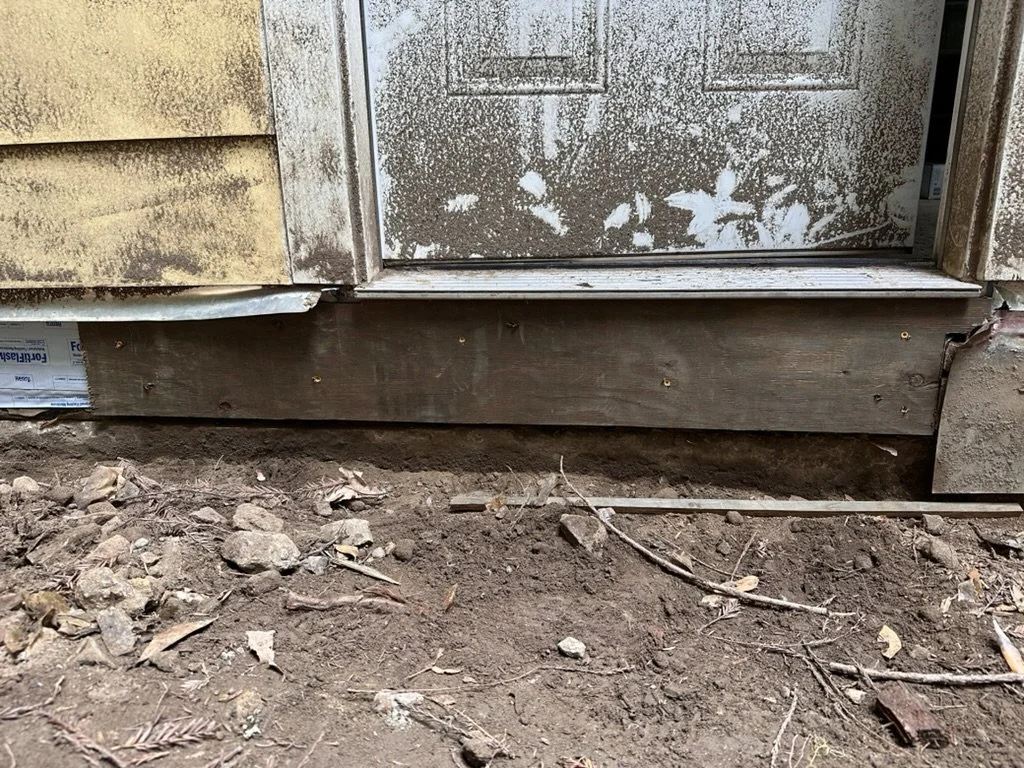
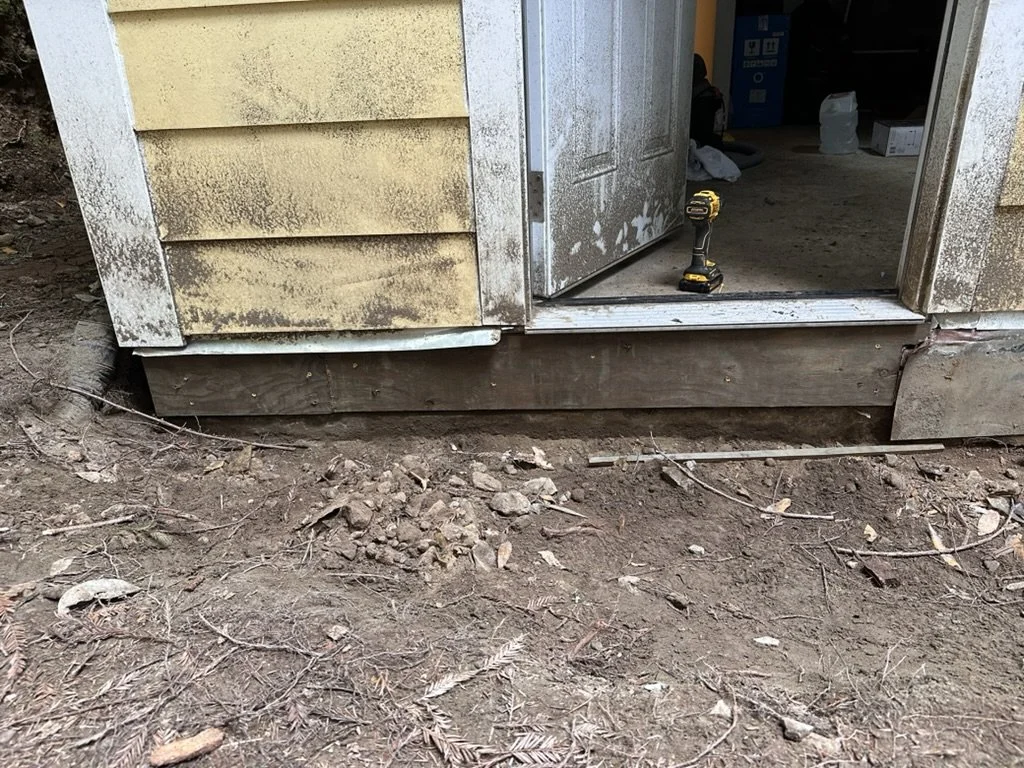
I liberally applied caulking around all the edges and especially in the nook to the bottom right of the door. I then cut a piece of flashing to size and nailed it on. More caulking was liberally applied again around the bottom of the door, on each nail head, and on most seams.